وضاحتی ویڈیو کو ایک خیال سمجھنا آسان بنانا چاہیے۔
اسے بیک وقت مکمل پروڈکٹ تعارف، برانڈ فلم، تربیتی ویڈیو اور اشتہار بنانے کی کوشش نہیں کرنی چاہیے۔
ایک واضح وضاحت سے آغاز کریں
ماڈل چننے سے پہلے وہ ایک بات لکھیں جو ناظر کو سمجھنی چاہیے۔
مثالیں:
پروڈکٹ کی خصوصیت کیسے کام کرتی ہے
طریقۂ کار وقت کیسے بچاتا ہے
اوزار استعمال کرنے سے پہلے اور بعد کی حالت
صارف کا مسئلہ، عمل اور نتیجہ
نیا اجرا حقیقتاً کیا بدلتا ہے
اگر وضاحت ایک جملے میں پوری نہیں ہو سکتی تو ویڈیو کو شاید کئی الگ تخلیقی حصوں میں تقسیم کرنا چاہیے۔
وضاحتی ویڈیو کی صورت منتخب کریں
وضاحتی ویڈیوز کئی شکلیں اختیار کر سکتی ہیں:
مصنوعات کا مظاہرہ
پہلے اور بعد کا کلپ
کسی عمل کی سادہ حرکت
معاون بصری مواد کے ساتھ وائس اوور
بانی کے انداز میں وضاحت
سوشل میڈیا کے لیے مختصر وضاحت
پرامپٹ لکھنے سے پہلے انداز منتخب کریں۔ مصنوعات کا عملی مظاہرہ اور پس پردہ آواز والی وضاحتی ویڈیو مختلف ابتدائی مواد مانگتے ہیں۔
حرکت کو تین مرحلوں میں ترتیب دیں
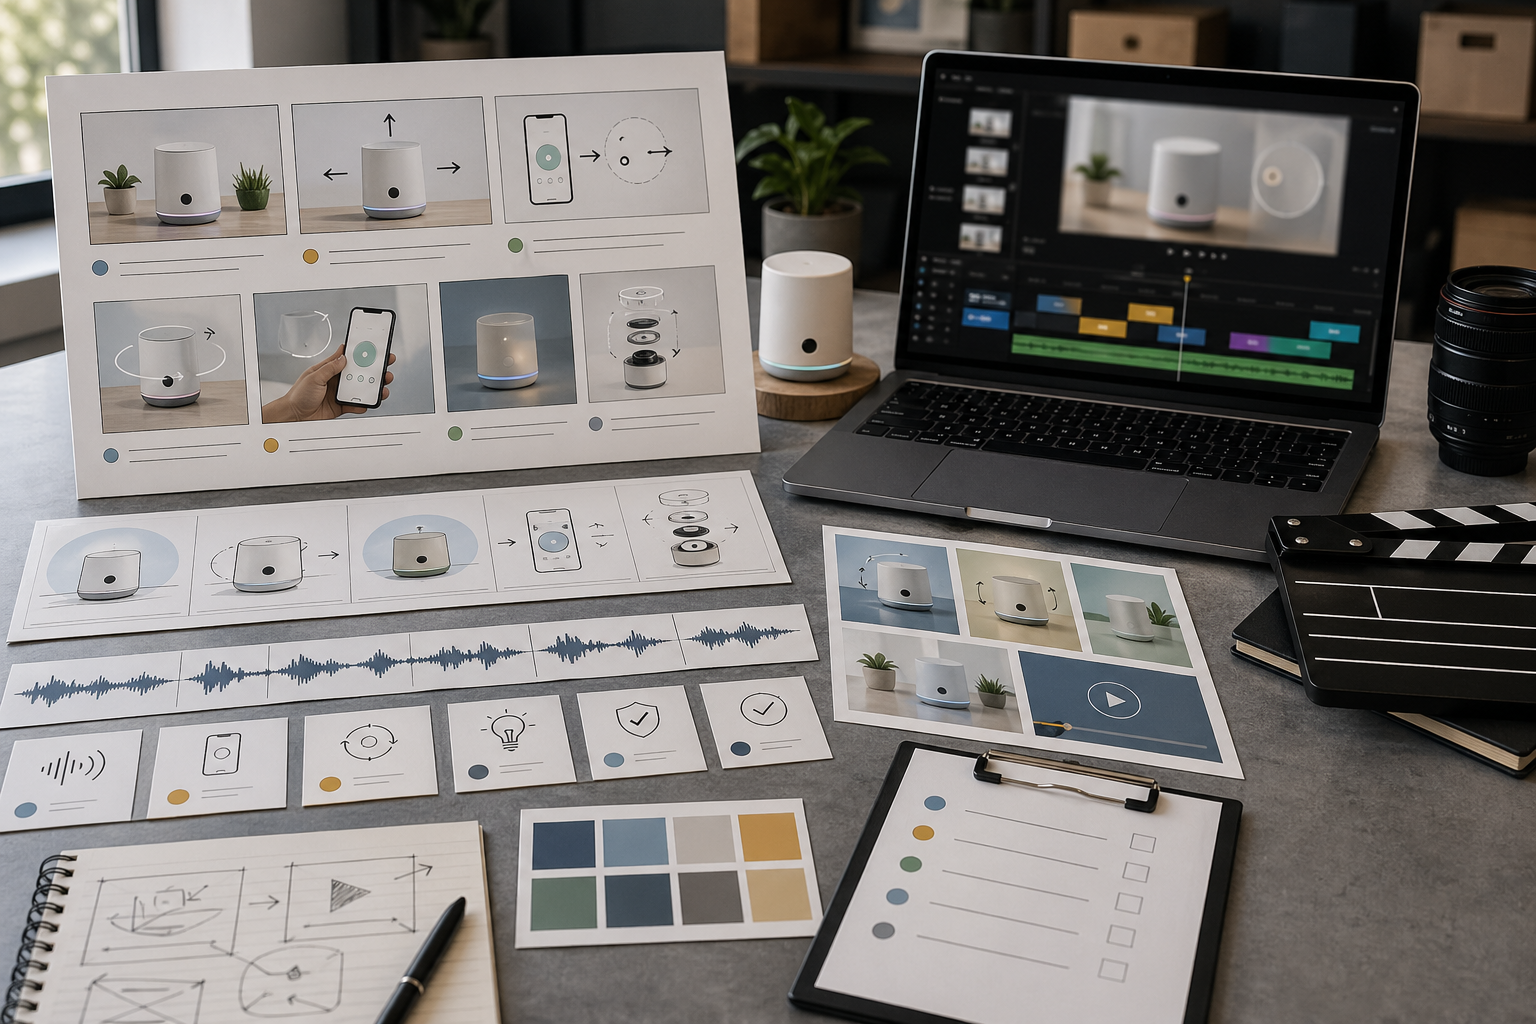
ایک سادہ وضاحتی ویڈیو کی ساخت یہ ہے:
مسئلہ یا ابتدائی حالت دکھائیں
مصنوعات یا طریقۂ کار کا عمل دکھائیں
نتیجہ یا اگلا قدم دکھائیں
اس سے ویڈیو مرکوز رہتی ہے۔ بہت زیادہ مناظر شامل ہوں تو ناظر حرکت یاد رکھ سکتا ہے مگر بنیادی نکتہ نہیں۔
طے کریں کہ بیانیہ آواز مددگار ہے یا نہیں
بیانیہ آواز اس وقت مدد دیتی ہے جب تصور کو مزید سیاق درکار ہو۔
بیانیہ آواز استعمال کریں:
سافٹ ویئر کے تجریدی طریقۂ کار
کسی عمل کی وضاحت
مقامی زبان میں وضاحتی مواد
بانی کے انداز میں مصنوعات کا تعارف
ایسے کلپس جن میں واضح زبانی پیغام ضروری ہو
اگر بصری خیال خود وضاحت کر سکتا ہو تو پہلے حرکت آزمائیں اور بعد میں Rivya کا آڈیو اسٹوڈیو کے ذریعے بیانیہ آواز شامل کریں۔
سمجھ میں آنے کے لحاظ سے جائزہ لیں
وضاحتی ویڈیو کو ان سوالات سے جانچیں:
کیا ناظر بنیادی خیال جلد سمجھ لیتا ہے؟
کیا حرکت وضاحت کو تقویت دیتی ہے؟
کیا مصنوعات یا طریقۂ کار اب بھی پہچانا جا سکتا ہے؟
کیا بیانیہ آواز بہت گنجان ہے؟
کیا کلپ کو مزید مختصر ہونا چاہیے؟
کیا اگلا قدم واضح ہے؟
اچھی وضاحتی ویڈیو ذہین دکھائی دینے سے پہلے واضح ہوتی ہے۔
وضاحتی ویڈیو کی عام غلطیاں
عام غلطیوں میں یہ شامل ہیں:
ایک کلپ میں بہت سی باتیں سمجھانے کی کوشش کرنا
پیغام سے پہلے بصری انداز سے آغاز کرنا
ایسا متن استعمال کرنا جو تعارفی صفحے جیسا لگے
چھوٹا مگر قابلِ مطالعہ صارف سطح کا متن مانگنا
کیمرے کا زاویہ بار بار بدلنا
پہلے اور بعد کی سادہ ساخت چھوڑ دینا
وضاحت کو مخصوص رکھیں، پھر تخلیقی مواد کو نفیس بنائیں۔
وضاحتی ویڈیو کے خاکے کا سانچہ
تخلیق سے پہلے ایک مختصر خاکہ استعمال کریں:
سامعین: [نیا ملاقاتی / خریدار / ساتھی / معاونت حاصل کرنے والا صارف]
وضاحت کا ایک موضوع: [خصوصیت، عمل، مصنوعات کا فائدہ، پالیسی]
ابتدائی الجھن: [وہ کس بات کو غلط سمجھتے ہیں]
تین مراحل: [مسئلہ] → [طریقہ] → [نتیجہ]
بصری مرکز: [اسکرین، مصنوع، خاکہ، شخص، شے]
بیانیہ آواز: [نہیں / مختصر عبارت / مکمل وائس اوور]
کامیابی کی جانچ: [دیکھنے کے بعد ناظر کو کیا سمجھ آنا چاہیے]
اچھی وضاحتی ویڈیو عموما مخصوص ہوتی ہے۔ اگر خاکے میں تین الگ اسباق ہوں تو اسے تین کلپس میں تقسیم کریں۔
Rivya میں تیاری کا راستہ
وضاحتی ویڈیو کا مستحکم طریقۂ کار یہ ہے:
وضاحت کا مسودہ گفتگو یا پرامپٹ سانچے میں لکھیں۔
اسے تین بصری مراحل میں بدلیں۔
حرکت کے ایک واضح مقصد کے ساتھ ویڈیو کا راستہ بنائیں۔
بیانیہ آواز صرف تب شامل کریں جب مناظر خود وضاحت نہ کر سکیں۔
کلپ کا پہلے آواز کے بغیر اور پھر آواز کے ساتھ جائزہ لیں۔
نتیجہ محفوظ کریں اور متعلقہ وضاحتی ویڈیوز کے لیے ساخت دوبارہ استعمال کریں۔
یہ ویڈیو کو بہت سے دعووں والے متحرک کتابچے میں بدلنے سے روکتا ہے۔
Rivya میں اگلے اقدامات
وضاحتی حرکت ویڈیو میں شروع کریں، اور بیانیہ آواز آڈیو سے صرف تب شامل کریں جب بصری سمت واضح ہو۔
وضاحتی حرکت بنانے کے لیے Rivya کا ویڈیو اسٹوڈیو استعمال کریں۔
جب بیانیہ آواز اہم ہو تو Rivya کا آڈیو اسٹوڈیو استعمال کریں۔
مختصر خاکے کو بہتر بنانے کے لیے Rivya میں پرامپٹ لکھنے کی بنیادی باتیں استعمال کریں۔
جب وضاحتی ویڈیو دراصل مصنوعات کا عملی مظاہرہ ہو تو AI مصنوعات کے عملی مظاہرے کا ویڈیو جنریٹر پڑھیں۔